Making Maps with Google's Map API
January 29, 2018
This week, I spent a decent amount of time working with Google’s Map API for a Hackathon project. While I won’t go into the details of the project (for now at least), I wanted to share some of the things I learnt about using Google Map’s API system. Overall, getting the map up and running is pretty simple, however if you’re trying to use one of the custom made libraries designed to make integrating Google Maps into a front end framework like React, it can get a little complicated. For the purpose of this post, I’m sticking to simple HTML/CSS and Javascript as I’d like to share the gist of what Google Map APIs can do, and not the nitty gritty’s of getting it to work with a specific framework.
Getting the API Connected
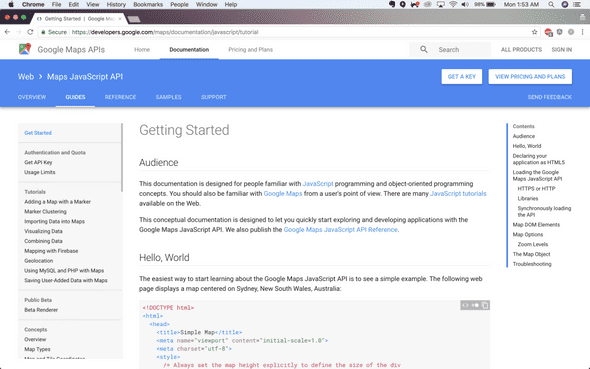
The first thing we need to do is get an API key for Google Maps. To do this, you’ll need to log in (or create) a Google Developer account (if you have a gmail account, just log in). I’m specifically referencing the Maps Javascript API in this example. This is what the page looks like. You’ll need to click on the “Get Key” button in the top right.
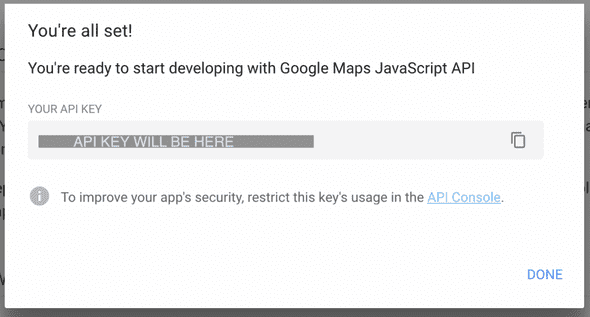
Select an existing project, or create a new one and continue. You’ll then see a screen saying “You’re all set” with an API key. Copy that key, and keep it safe.
Getting A Basic Google Map To Display
Next I’ll begin constructing my HTML page. I’m going to start with a skeleton shell of HTML code for a generic website.
<!DOCTYPE html>
<html>
  <head>
    <title>Google Map Example | aashni.me</title>
    <meta name\="viewport" content\="initial-scale=1.0" \ />
    <meta charset\="utf-8" \ />
  </head>
  <body>
    Google Map goes here
  </body>
</html>
To get the map to load on the page, there are four little bits of code that need to be added in. The first is a reference to Google’s API script. Make sure you replace “YOURAPIKEY” with the API key from the first step. Generally, HTML will parse until it hits a script tag. It then pauses the HTML parsing until it’s fetched and executed the external script. By adding async, we tell the HTML to continue parsing while fetching the external script. Defer tells the browser to only execute the script once the website has finished parsing all other HTML. This website has a great breakdown on what async and defer are. In order to speed up HTML parsing, we also load the script tag at the end of our file. The last thing to note here is that the script has callback=initMap on the end. Once the script is complete, it will call the initMap function that we’ll setup soon.
<script
  src\="https://maps.googleapis.com/maps/api/js?key=YOUR\_API\_KEY&callback=initMap"
  async
  defer\
></script>
The next piece of code to include is an HTML div that we’ll use to display the map. By providing the value map to the div’s id attribute, the javascript can replace it with the actual map. This goes into the top of the body of the page.
<div id\="map" \></div>By default, a div’s height is set to 0. In order to actually see the map, we’ll need to explicitly set a map height, which we can do using CSS. Additionally, we also want to set the body and html height to a 100% so that the div expands properly. This can go into the page head.
<style type\="text/css" \>
  #map {
    height: 100%;
  }
  html,
  body {
    height: 100%;
    margin: 0;
    padding: 0;
  }
</style>
Finally, the last code bit to display the website is to initialize the map on your website using some javascript. This can go between the HTML div tag, and the script tag to include the Map API. This script contains the initMap function discussed earlier, and creates a variable var called map. We then assign var a new google map object that accepts to variables. The first is a reference to the div, while the second is an object with some additional configuration settings. In this case, I’ve set the centre location, or the initial map load area to be 43.6532, -79.3832 which maps to Toronto. I then set the zoom to 4 so you can contextually see more on the map.
<script>
  var map
  function initMap() {
    map = new google.maps.Map(document.getElementById("map"), {
      center: {
        lat: 43.6532,
        lng: -79.3832,
      },
      zoom: 4,
    })
  }
</script>
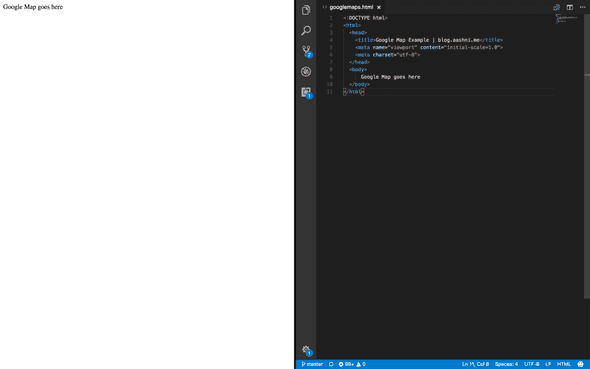
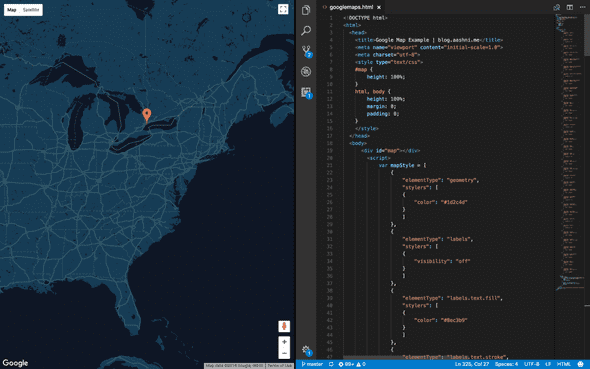
This what my code and browser look like side by side.
Adding a Marker
It’s surprisingly easy to add markers to the map! Yay! Inside the initMap function, add the following code. Here, the variable marker is being used to create a new market object from Google’s Map API. It expects a few arguments like the position (I set it to Toronto) and which map to attach the marker to.
var marker \=  new google.maps.Marker({
  position:  {lat:  43.6532, lng:  \-79.3832},
  map: map
});
The great thing about this structure is you can create multiple markers at a given time, and as long as you use a smart naming convention, you can make changes or control them in the future. There are some additional values we can pass into the Marker function, for example changing the icon, appending actions to the marker if it’s been clicked or letting the icon be dragged around the map. Check out the references for a full list of optional arguments.
Adding some Styling
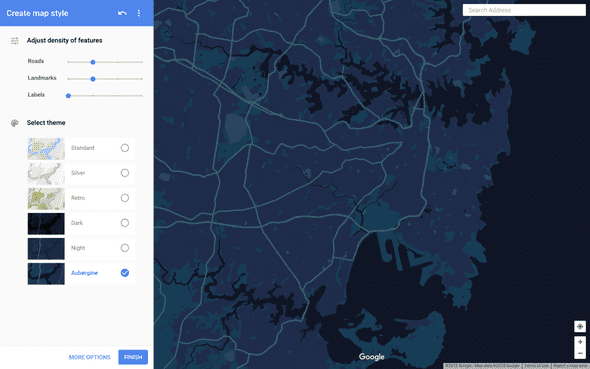
One of the really great things about Google’s Map API is that they can easily be styled to match your website, highlight different pieces of information and hide information too. I’ll use a JSON type block to hold the different style attributes I’d like to use in my app. Google has provided a Style Reference guide, however I actually prefer using the Styling Wizard instead. As you can see below, the styling wizard lets you go in and either select a default style, or individually go in and change the style to match your own preferences.
Once you’re happy with your style, you can hit finish and then copy the JSON blob with all the styling details. Create a variable in your javascript script section called mapStyles and assign the JSON blob to the variable. In the earlier code that creates the map, add an additional parameter called styles with mapStyles as the value. I’ll do a mini example here.
var mapStyle = [
  {
    elementType: "geometry",
    stylers: [
      {
        color: "#1d2c4d",
      },
    ],
  },
]
map = new google.maps.Map(document.getElementById("map"), {
center: { lat: 43.6532, lng: \ - 79.3832 },
zoom: 5,
styles: mapStyle,
})You can see a final look at the overall code on GitHub, or see a live version of the code at aashnisshah.github.io/googlemaps.
If I get a chance one of these days, I may build up more on this map and turn it into a “places I’ve visited, places I want to visit” kind of thing. But for now, I’ll leave it like this.
Let me know what type of maps you built if you use this!
